Sign up + pick your plan
Create your PostGrad account, pick a subscriber tier, and confirm your email so you can start making API calls.
PostGrad is a metered API — before you can make a call, you need an account and a tier that matches how much knowledge your agent will pull. This walkthrough gets you from the marketing home page to a logged-in dashboard in about two minutes.
Before you start: have a working email address and a card you're willing to use for the subscription. Paid tiers run through Stripe Checkout, so no card details ever touch PostGrad.
Open postgrad.io and scroll to pricing

The toggle at the top of the pricing section switches between "For agent builders" (you) and "For licensors" (publishers selling feeds). Stay on "For agent builders" for this walkthrough.
Compare the three tiers
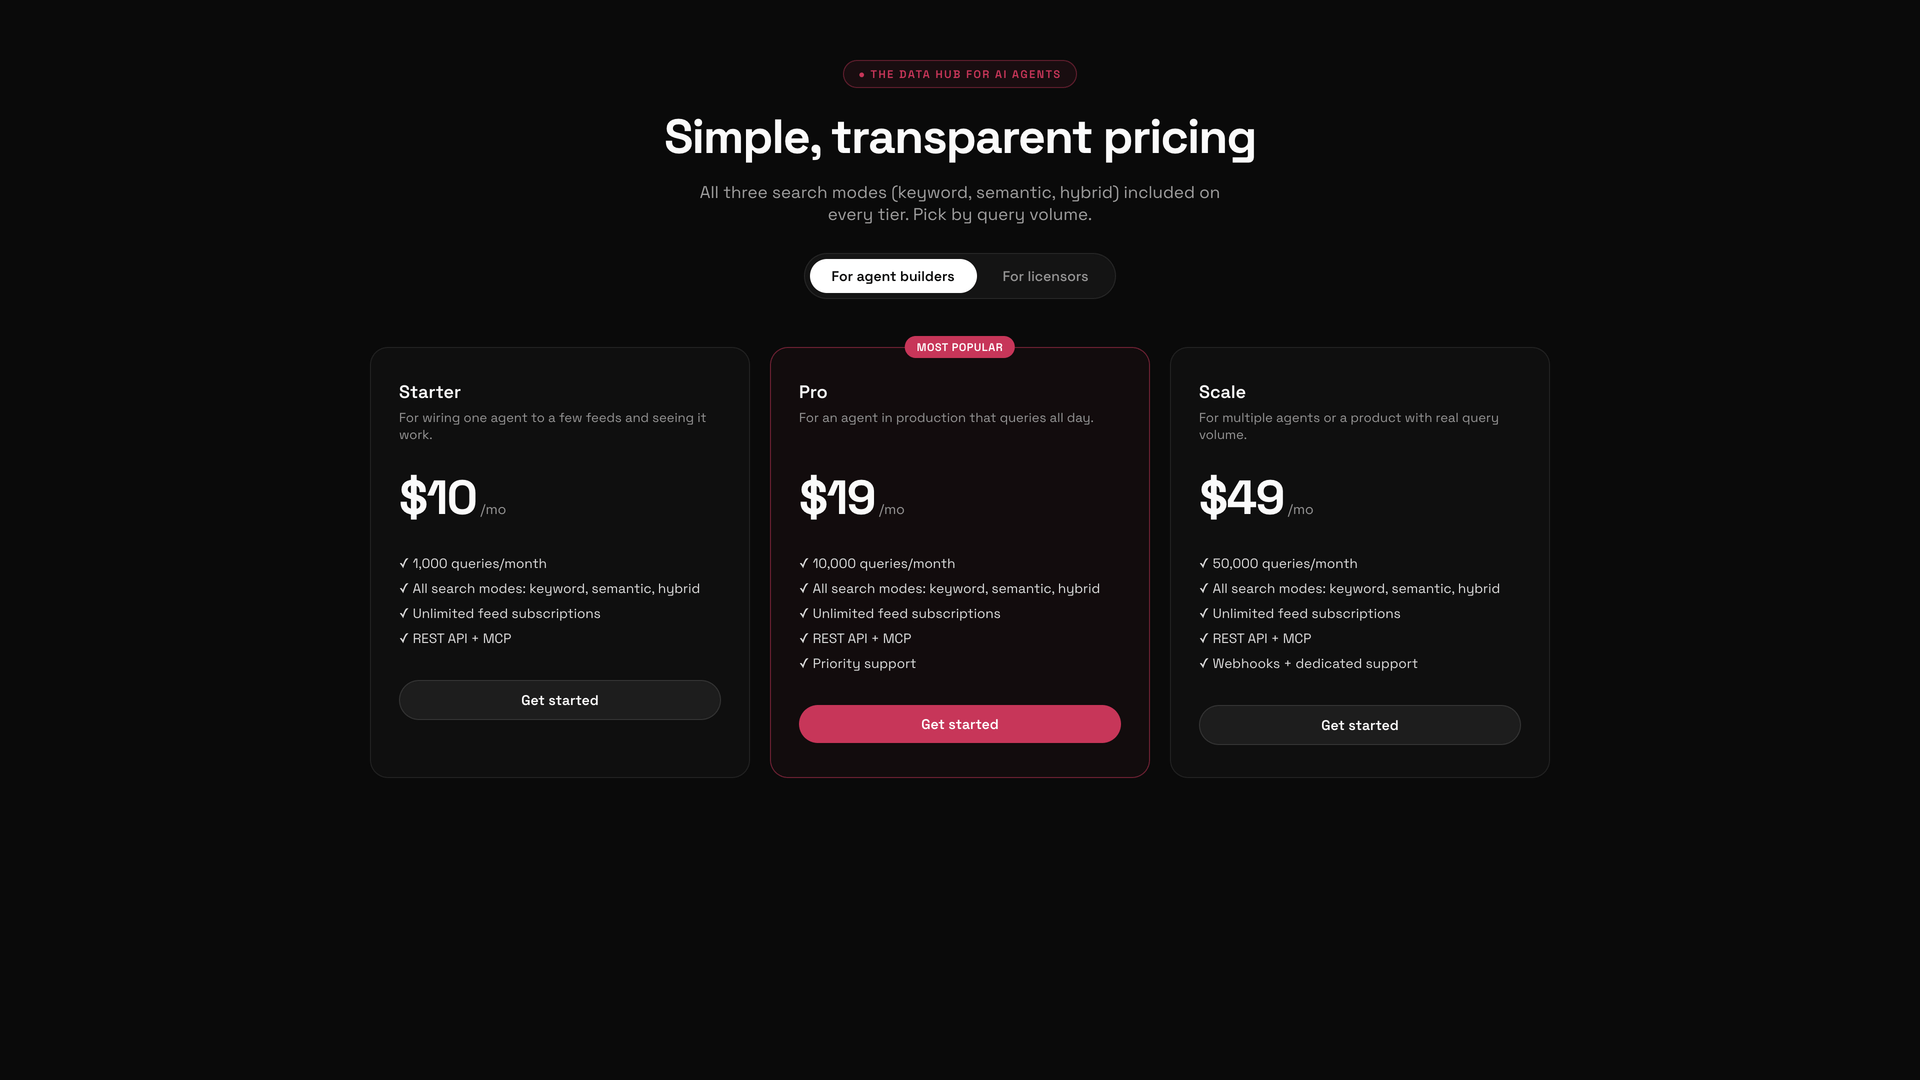
If you're not sure which tier to pick, Pro is the right default. You can upgrade or downgrade anytime from your dashboard — see Upgrade or downgrade your tier.
Click "Get started" on the tier you want

Complete Stripe Checkout
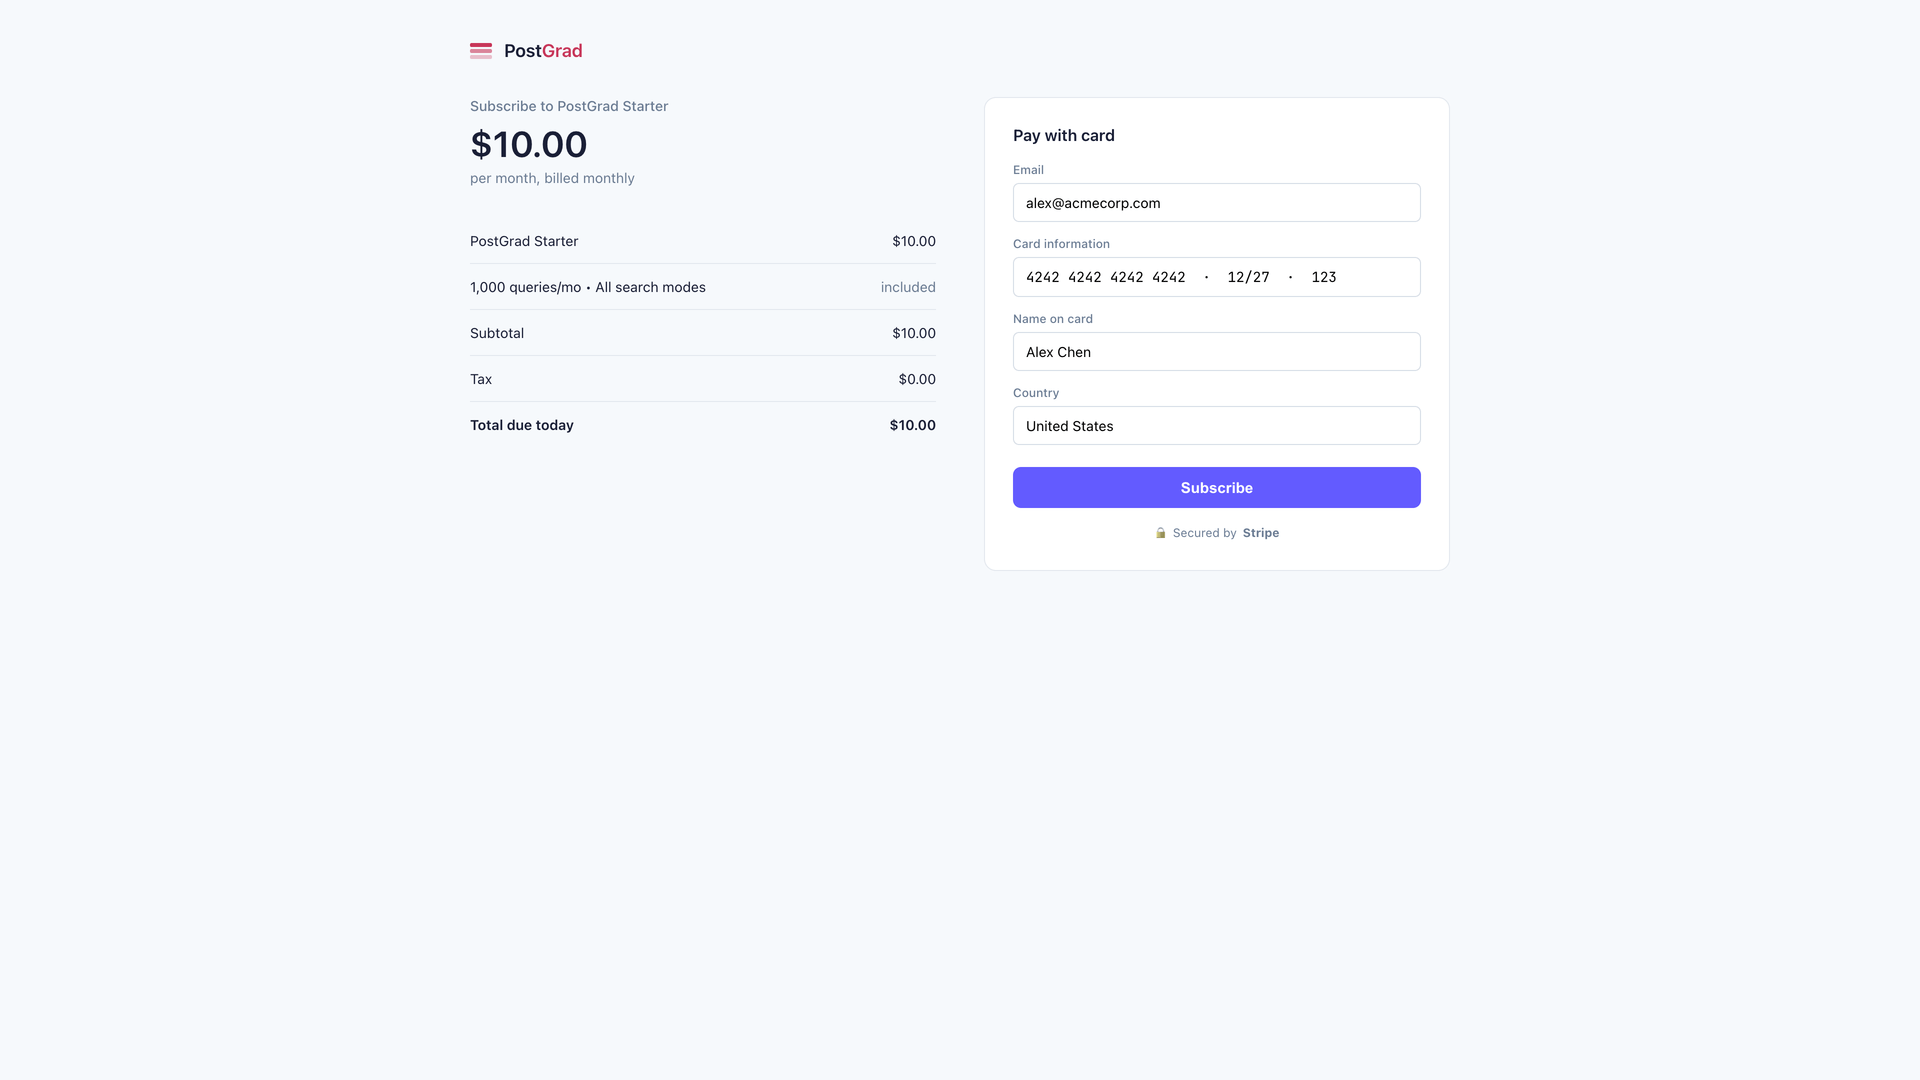
If you already have an account under that email, sign in instead — the subscription will attach automatically once the webhook catches up (a few seconds).
Set your password and verify your email
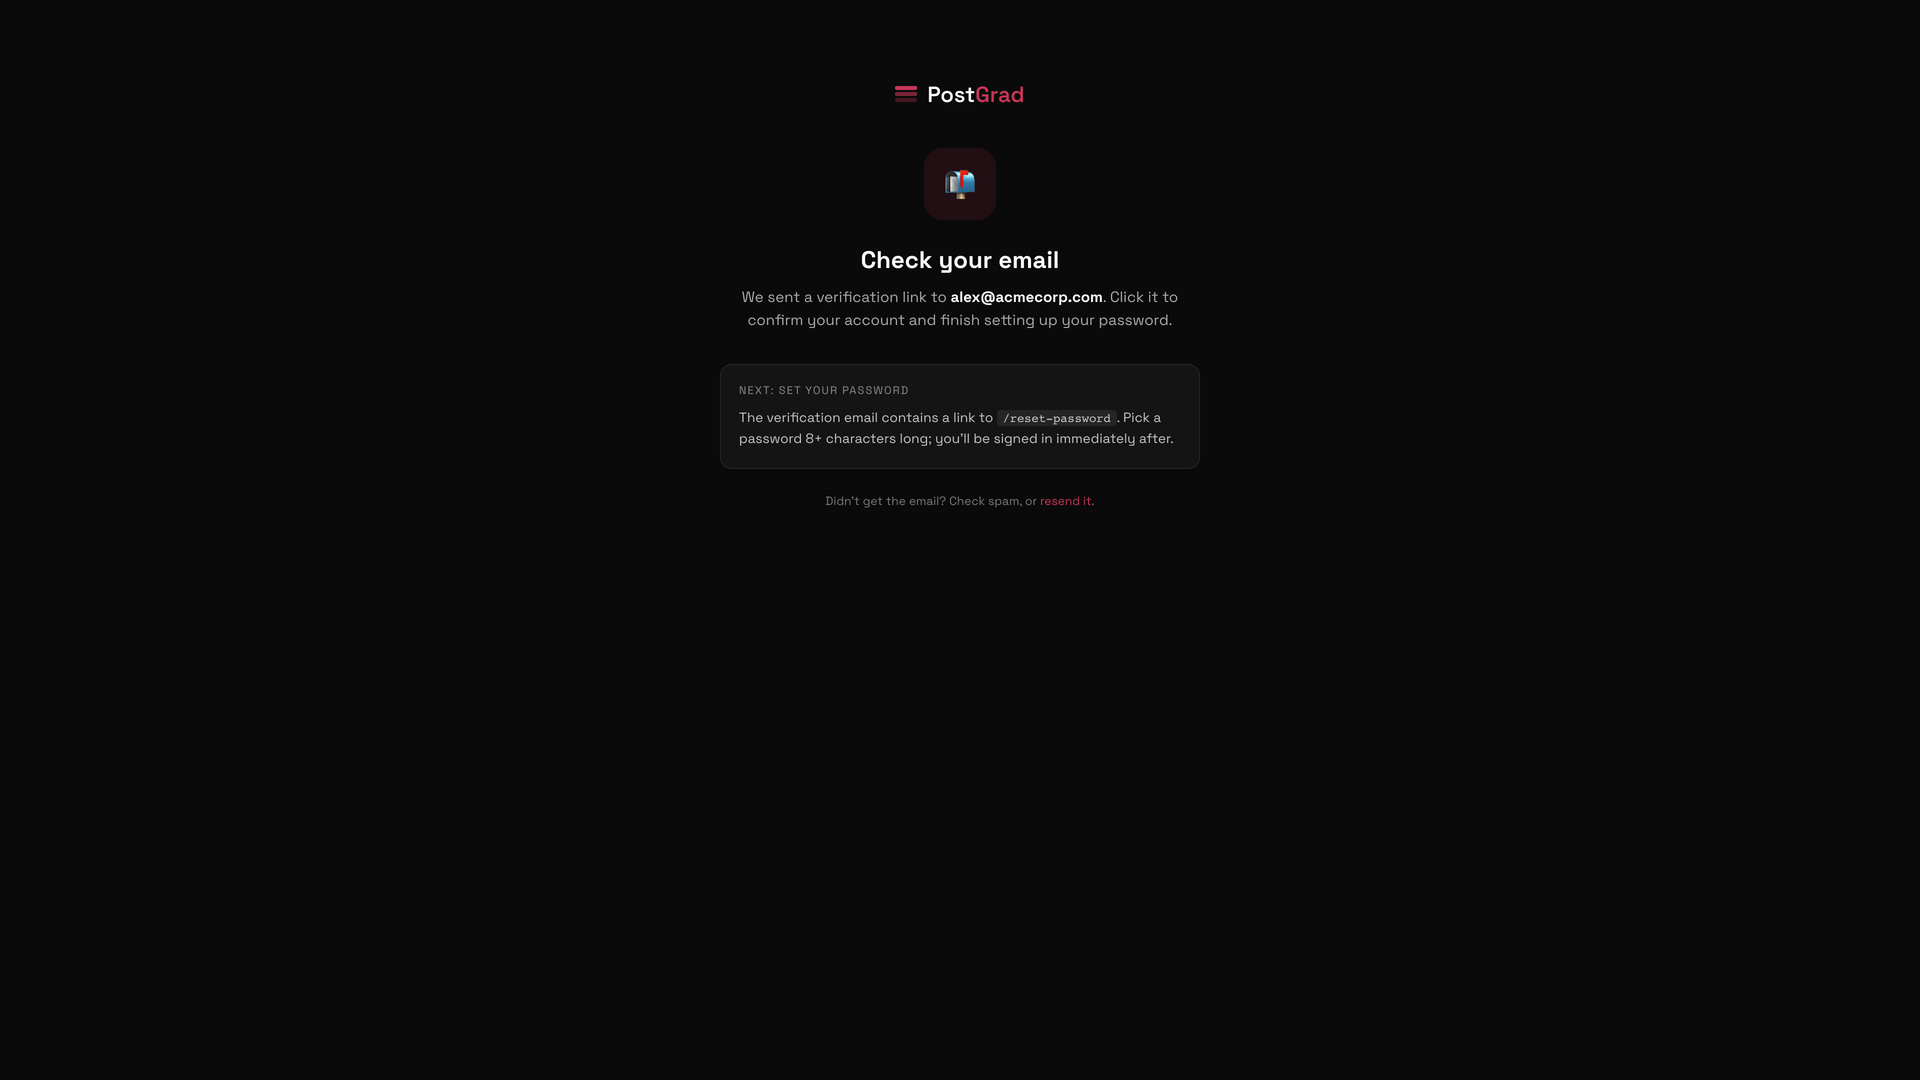
Didn't get the email? Check spam, then use the "Resend" option on the confirmation page. The link expires after an hour.
Land on your dashboard
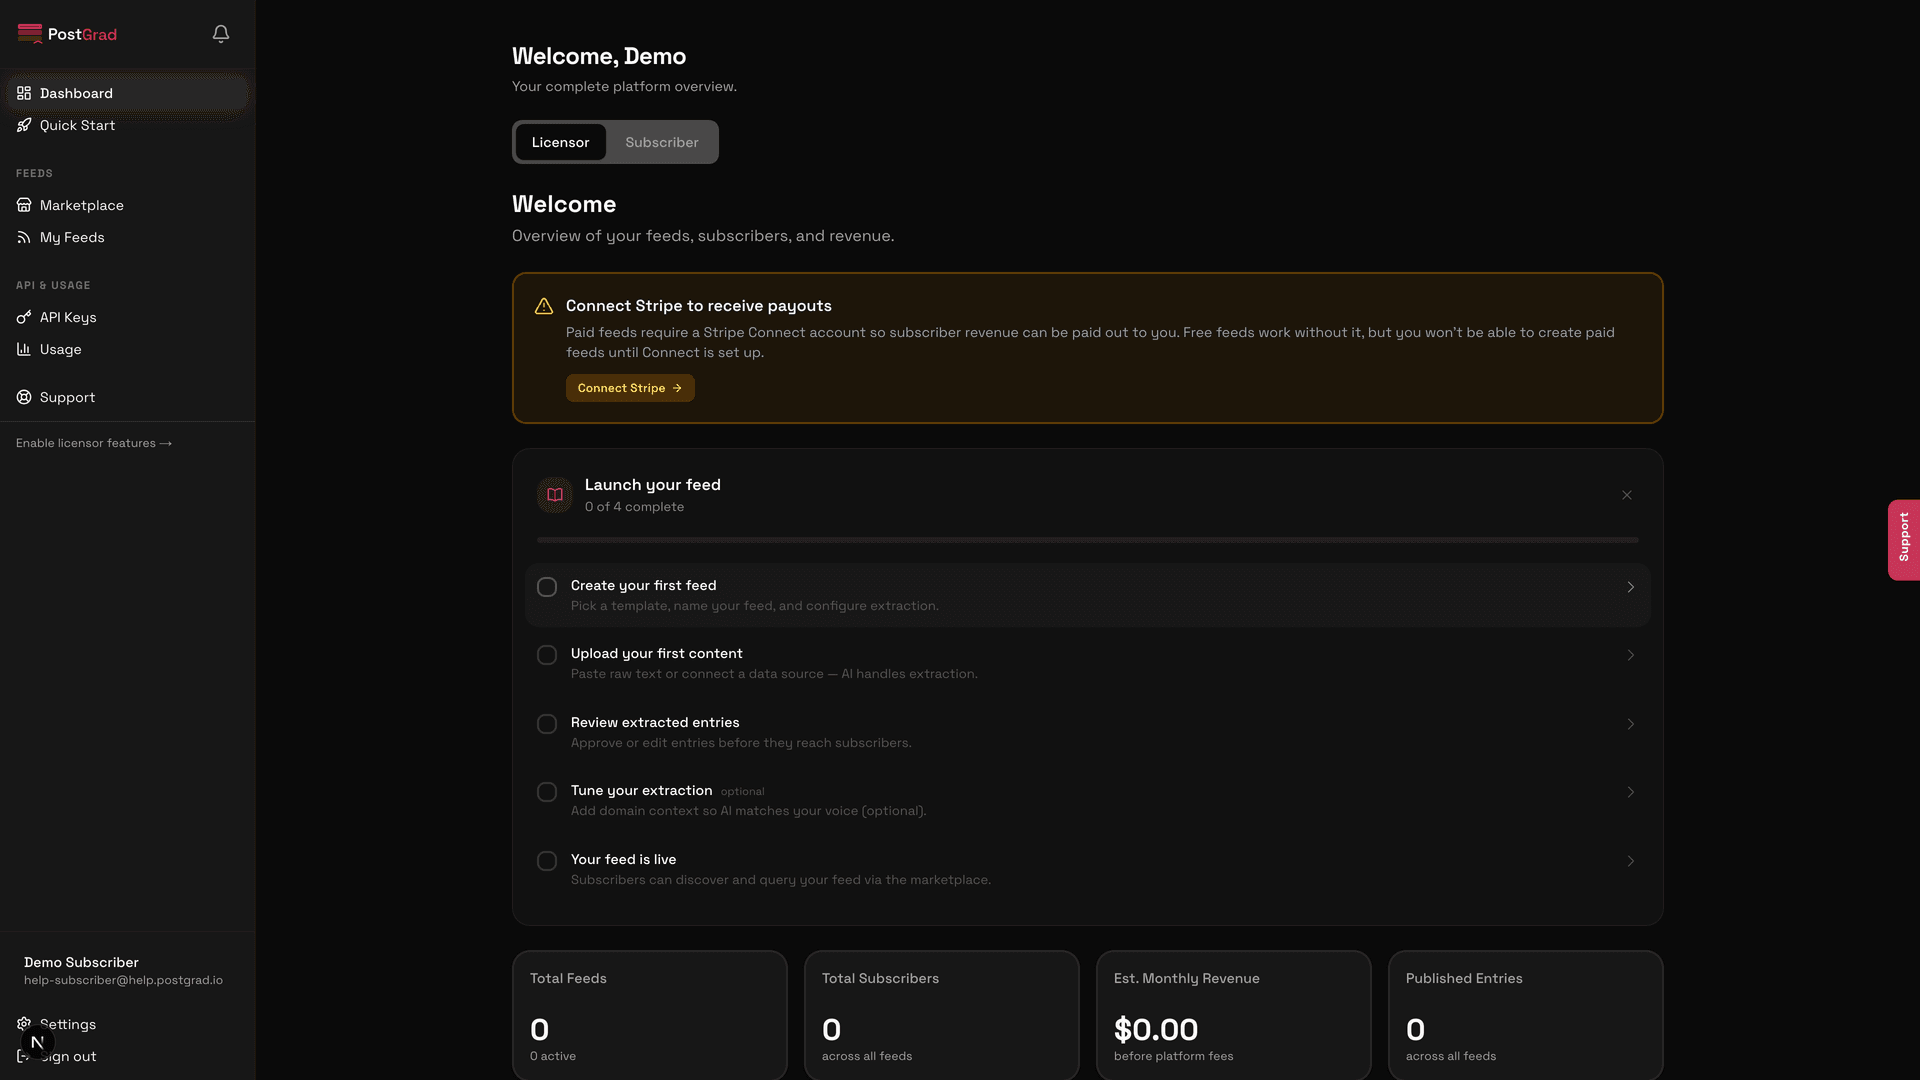
The Quick Start panel walks you through the first three things to do: generate an API key, subscribe to a feed, and make a test call. The rest of this Help Center covers each of those in detail.
What's next
You have an account and a plan. Now wire it up:
- Create your first API key — Get your first API key takes about 90 seconds.
- Subscribe to a feed — Subscribe to a paid feed covers the end-to-end checkout for marketplace feeds.
- Make your first call — Make your first API call shows the three core endpoints and a copy-pasteable curl command.